How to Install Vinyl Plank Flooring: Complete DIY Guide
Everything you need to know about vinyl plank flooring installation — from subfloor prep to the final trim piece. Save thousands by doing it yourself.
Quick Reference: LVP Installation at a Glance
- Difficulty: Beginner-friendly (click-lock) / Intermediate (glue-down)
- Time: 200–300 sq ft per day for most DIYers
- Acclimation: SPC vinyl — none required; WPC vinyl — 24 hours minimum
- Expansion Gap: 1/4″ (SPC) or 3/8″ (WPC) around all walls and fixed objects
- Subfloor Tolerance: Flat to 3/16″ per 10-foot radius
- Stagger: At least 8″ between end joints on adjacent rows
- DIY Savings: $1.50–$4.00/sq ft vs. professional installation
In This Guide:
- Why DIY LVP Installation Is Worth It
- What You'll Need: Tools and Materials
- How to Prep Your Subfloor
- How to Acclimate Your Vinyl Plank Flooring
- Step-by-Step Installation Guide
- How to Cut Vinyl Plank Flooring Around Obstacles
- Finishing Touches: Trim, Transitions & Stair Treads
- Vinyl Plank Flooring Installation Cost: DIY vs. Professional
- Common Mistakes to Avoid
- FAQ
Why DIY Vinyl Plank Flooring Installation Is Worth It
Luxury vinyl plank flooring is one of the few home improvement projects where the DIY version looks just as good as the professional version. Unlike tile (which requires mortar skill) or hardwood (which often requires nailing), modern LVP flooring uses a click-lock system that literally snaps together. No glue. No nails. No special skills.
The savings are real. Professional vinyl plank flooring installation typically costs $1.50–$4.00 per square foot for labor alone. On a 1,000 sq ft project, that's $1,500–$4,000 you keep in your pocket by doing it yourself. And unlike some DIY projects where "good enough" is the ceiling, a well-installed LVP floor is indistinguishable from a professionally installed one.
This guide covers everything: subfloor prep, acclimation, click-lock and glue-down methods, cutting around doors and obstacles, and finishing with trim and transitions. Whether this is your first flooring project or your fifth, you'll have everything you need to install waterproof vinyl plank flooring that looks and performs like a professional job.
Still choosing your floor? Start with a sample before you commit to material.
Order Samples →What You'll Need: Tools and Materials
One of the best things about vinyl plank flooring installation is the short tool list. You probably own most of these already.
Essential Tools
- Utility knife with extra blades — your primary cutting tool for straight cuts (score and snap)
- Tapping block — protects plank edges when tapping click-lock joints together
- Pull bar or double-sided prybar — hooks over the end of wall-side planks so you can tap them into place
- Rubber mallet — for tapping planks together via the tapping block (never strike planks directly). Use gently — excessive force can cause plank seams to peak.
- Spacers — 1/4″ for SPC vinyl, 3/8″ for WPC vinyl. You'll need 30–40 for an average room. Check your product's install guide for the correct size.
- Tape measure and pencil
- Carpenter's square or T-square — for marking straight crosscuts
- Level or straightedge (6′ minimum) — for checking subfloor flatness
Helpful but Not Required
- Miter saw or table saw — faster and more precise for rip cuts and crosscuts, especially with thicker SPC vinyl
- Jigsaw — for curved cuts around toilet flanges and pipes
- Oscillating multi-tool — for undercutting door jambs and casings
- Knee pads — you'll be on the floor all day; your knees will thank you
- Chalk line — useful for marking the first row in large rooms
Materials
- Vinyl plank flooring — order 10–15% more than your measured square footage to account for cuts and waste. Use our flooring square footage calculator to get the number, waste factor included. Haven't picked your floor yet? Order samples to see the color and texture in your space first
- Underlayment — only if your planks don't have it pre-attached (check your product specs)
- 6-mil polyethylene moisture barrier — required over concrete subfloors. Overlap seams at least 6″ and tape all seams with duct tape
- Transition strips — T-molding for same-height transitions, reducer for height changes
- Quarter-round or shoe molding — to cover the expansion gap along walls
- Self-leveling compound — only if your subfloor has low spots beyond tolerance
How to Prep Your Subfloor for Luxury Vinyl Plank Flooring
Subfloor prep is the most important step in any vinyl plank flooring installation. A bad subfloor will telegraph through vinyl and create visible bumps, ridges, and click-lock failures. Get this right and everything else is straightforward.
Flatness Requirements
Your subfloor must be flat to within 3/16″ over a 10-foot span. Lay a 6-foot straightedge or level across the floor in multiple directions and check for gaps underneath.
- High spots: Sand or grind down with a floor sander or angle grinder
- Low spots: Fill with a Portland-based patching compound or self-leveling underlayment
- Plywood subfloors: Screw down any squeaky or loose areas; fill seams and knotholes with patching compound
- Concrete subfloors: Grind any raised areas from trowel marks or old adhesive residue
Subfloor Types and Requirements
| Subfloor Type | Can Install Over? | Prep Required |
|---|---|---|
| Plywood / OSB | Yes | Screw down loose areas, fill seams, sand high spots |
| Concrete | Yes | Must be fully cured (60+ days), moisture test, vapor barrier, level/grind as needed |
| Existing tile | Yes | Fill grout lines with a compatible patch compound; tiles must be well-bonded, clean, and level |
| Existing hardwood/laminate | Yes | Must be firmly attached and flat; repair any loose boards |
| Existing vinyl (single layer) | Yes | Must be fully bonded and flat; no cushioned or multi-layer vinyl. Do not sand — may contain asbestos |
| Carpet | No | Must remove completely including pad and tack strips |
| Cushioned / multi-layer vinyl | No | Too soft; will cause click-lock joint failure |
Concrete Moisture Testing
If you're installing over concrete, you need to test for moisture before installation. Concrete must be fully cured and at least 60 days old, preferably 90 days. Slabs on or below grade must be free of hydrostatic pressure.
Even though vinyl plank flooring is waterproof, it is NOT a moisture barrier. Manufacturers require the use of a moisture barrier (like 6-mil polyethylene plastic) on concrete subfloors for above, at, and below grade installations. When laying 6-mil plastic, overlap seams at least 6″ and cover all seams with duct tape.
Wood subfloors reading higher than 13% moisture content require finding and correcting the moisture source before continuing installation. If your plywood subfloor is above 13% MC, do not install until the issue is resolved.
Final Prep
- Sweep and vacuum thoroughly — even small debris under vinyl planks will create visible bumps
- Remove all baseboards (you'll reinstall after)
- Undercut door jambs and casings so planks slide underneath (use an oscillating tool or jamb saw with a plank as a height guide)
- Remove toilet if installing in a bathroom (much cleaner than trying to cut around the flange)
- Check that all doors will clear the new floor height — you may need to trim the bottom of doors
How to Acclimate Your Vinyl Plank Flooring
Acclimation requirements depend on the type of vinyl you're installing. This is one area where SPC and WPC vinyl differ significantly — and getting it wrong can cause problems after installation.
Acclimation: SPC vs. WPC
SPC Vinyl (Rigid Core):
No acclimation needed. Due to the dense, rigid nature of SPC vinyl, installation can start immediately. However, if boxes were stored in extreme heat or cold (like a garage in winter), bring them to room temperature for a few days before installing.
WPC Vinyl (Foamed Core):
24 hours minimum. Store planks at room temperature, unopened and in their original packaging, as close to the installation area as possible. Room temperature and relative humidity must be consistent with year-round living conditions for at least 5 days prior to installation.
Both types:
- Transport and store cartons flat — never stand boxes on end
- Stack no more than 8 cartons (4 ft.) high
- Keep away from direct sunlight
Why this matters for WPC: WPC vinyl has a foamed core that's slightly more responsive to temperature changes than SPC. If you install WPC planks that are cold, they may expand as they warm up and could buckle against walls. SPC's dense stone composite core is dimensionally stable enough to skip this step entirely.
Pro tip: Even though SPC doesn't require formal acclimation, if your flooring was shipped in winter and the boxes are cold to the touch, it's still smart to let them come to room temperature before installing. Cold planks can be stiff and harder to click together.
Not sure which LVP to order yet? Use your subfloor prep time to your advantage. Order samples now and live with them in your space for a few days while you prep. See how the color reads under your lighting, against your walls, and next to your furniture before committing to a full order.
Step-by-Step LVP Flooring Installation Guide
Method 1: Click-Lock Floating Installation (Most Common)
This is how the vast majority of luxury vinyl plank flooring is installed. The planks click together at the edges and float over the subfloor — they're not attached to anything underneath. It's fast, forgiving, and completely reversible.
Step 1: Plan Your Layout
- Direction: Lay planks following the direction of the main source of light, or along the longest straight exterior-facing wall. On wood subfloors, lay crossways to the existing floorboards. In hallways, always run planks lengthwise.
- Measure the room width and divide by the plank width. If the last row would be narrower than 1/3 the plank width, rip the first row narrower so both the first and last rows are a reasonable width.
- Stagger end joints by at least 8″ between adjacent rows. Avoid "H" joints (where end seams line up every other row). Vary the size of your starter piece for a natural, random stagger.
- Open multiple boxes and install from several cartons at the same time to ensure a good blend of color, shade, and pattern across the floor.
Step 2: Start the First Row
- Start in the left corner of the room (for drop-lock systems, start from the right). Place the tongue side facing the wall.
- Place spacers between the plank and the wall on both the long side and the short end. Use 1/4″ spacers for SPC vinyl or 3/8″ spacers for WPC vinyl — check your product's install guide. This expansion gap is critical.
- Connect the second plank to the first by angling the short end into the previous plank's end joint at about 45 degrees, then pressing down until it clicks flat.
- Continue across the room. Cut the last plank in the row to fit, maintaining the expansion gap at the wall.
- Save the cut-off piece — if it's at least 8″ long, use it to start the next row. This creates natural stagger and reduces waste.
Step 3: Install Subsequent Rows
- Angle the long side of the new plank into the previous row's groove, pushing forward until the long side interlocks snugly with no gapping.
- Use the rubber mallet to gently tap the butt end (short end) seams together. Butt end seams should be smooth to the touch when properly engaged. Use a tapping block on the long side to ensure secure engagement.
- For the last plank in each row, use the pull bar or prybar and a hammer to engage the final plank. Insert a spacer to maintain the expansion gap.
- Inspect every row before moving on. Check the long edge and short ends for any gapping. If you notice gaps, stop and reinstall the boards to ensure a snug fit.
- Maintain spacers against all walls, cabinets, pipes, and fixed objects throughout. Never nail or screw anything through a floated floor.
Step 4: Install the Last Row
- Measure the gap and subtract for the expansion gap. The ripped piece must be at least 1/3 the width of a full plank (or at least 3″ for WPC products).
- Rip planks to width using a utility knife (score and snap) or table saw for cleaner cuts. If the last row would be too narrow, go back and rip the first row narrower so both sides end up at a reasonable width.
- Use the pull bar and rubber mallet to engage the length of the last plank into the previous row.
Method 2: Glue-Down Installation
Glue-down is less common for DIY but preferred in some commercial applications and rooms with heavy rolling loads (like kitchens with islands on casters). It creates a firmer, more permanent installation.
- Use only the adhesive recommended by your flooring manufacturer — using the wrong adhesive can void your warranty. The recommended adhesive typically doubles as a moisture barrier on concrete.
- Spread adhesive with a 1/16″ x 1/16″ x 1/16″ square-notch trowel. Do not spread more than an arm's length (6–8 feet) of adhesive at a time to prevent the glue from flashing over before you can lay planks.
- Click planks together as you lay them into the adhesive. Be careful not to let installed planks move on wet adhesive while you work. Use a tapping block as needed.
- Glue-down installations still require the same expansion gap at walls and fixed objects as floating installs.
- Important: Glue-down is not compatible with radiant heat systems. If you have radiant heat, use the floating click-lock method.
- Concrete moisture must not exceed 8 lbs (calcium chloride test) or 90% RH (in-situ probe). Alkalinity must not exceed 9.0 pH.
Why Larger Planks Make Installation Easier
Not all LVP installs the same. Plank size directly affects how fast you go and how the finished floor looks. Standard vinyl planks run about 6″ x 36–48″. Premium collections like CALI Vinyl Longboards are 9″ x 70-7/8″ — nearly double the coverage per plank.
Fewer planks per square foot means fewer clicks, fewer cuts, and fewer seams. In a 1,000 sq ft room, larger format planks can cut your install time by 30–40% compared to smaller store-brand planks. The wider, longer planksalso create a more seamless, high-end look — especially in open-concept spaces where the floor flows across large areas without transition strips.
Larger planks also tend to bridge minor subfloor imperfections better than small planks, which means less subfloor prep for the same visual result.
How to Cut Vinyl Plank Flooring Around Doors, Walls, and Obstacles
Straight Crosscuts (End of Row)
The easiest cut in LVP installation. Score the face of the plank along your mark with a utility knife and a straight edge. Score 2–3 times with firm pressure, then snap the plank along the score line. The break will be clean on the face side.
Rip Cuts (Narrowing Planks for the Last Row)
For the last row, you'll usually need to rip planks to a narrower width. You can score and snap with a utility knife, but a table saw or track saw gives a much cleaner edge — especially on longer planks. If you're using a power saw, cut with the face side up to prevent chipping.
Around Door Frames and Jambs
- Undercut the jamb first (during subfloor prep). Lay a plank flat against the jamb, rest your oscillating tool or jamb saw on top of the plank, and cut the jamb at that height. The plank slides underneath for a clean, finished look.
- For the plank itself, measure the notch needed around the door frame, mark it on the plank, and cut with a jigsaw or utility knife.
Around Pipes and Toilet Flanges
- Measure the pipe location and mark it on the plank. Drill a hole 3/4″ larger than the pipe diameter to allow for expansion.
- Cut a straight line from the nearest edge to the hole so you can fit the plank around the pipe, then glue the cut piece back in place.
- Cover the gap with a pipe escutcheon (decorative ring) for a finished look.
- For toilet flanges, use a jigsaw to cut a curve that follows the flange shape with adequate clearance for expansion.
Around Floor Vents
Remove the vent cover, install planks up to the opening with 1/4″ clearance, and reinstall the vent cover on top. The cover hides the cut edges. If your vent opening doesn't align with plank edges, cut a custom opening with a jigsaw or utility knife.
Cutting Tips for Clean Results
- Change your utility knife blade frequently — a dull blade drags and creates ragged edges
- For power saw cuts, use a fine-tooth blade (80+ teeth on a miter saw) to prevent chipping
- Always cut face-up with power saws and face-down with jigsaws (the blade cuts on the upstroke)
- Practice tricky cuts on scrap pieces first — you'll have plenty of off-cuts from row ends
Finishing Touches: Trim, Transitions, and Vinyl Stair Treads
Baseboards and Quarter-Round
After installation, remove all spacers. Reinstall your baseboards (or install new ones) so they overlap the expansion gap. The baseboards rest on the plank surface but are nailed to the wall — never nail through the vinyl flooring.
If you don't want to remove and reinstall baseboards, add quarter-round or shoe molding at the base of existing baseboards to cover the expansion gap. Nail the molding into the baseboard or wall, not the floor.
Transition Strips
Manufacturers carry matching vinyl flooring moldings for a seamless look:
- T-molding: Use where LVP meets another floating floor at the same height (like between rooms)
- Reducer: Use where LVP meets a lower surface (like tile or low-pile carpet)
- Threshold: Use where LVP ends at exterior doors or step-downs
- Quarter round: Covers the expansion gap at the base of walls
- Most transitions use a track that screws into the subfloor, with the molding piece snapping into the track
- Maintain the same expansion gap between plank edges and transition tracks. Baseboards and quarter round also need 1/16″ of space between trim and plank to allow movement.
- Important: If the installation area exceeds 80 feet in either direction, transition pieces are required to allow for expansion and contraction.
Vinyl Stair Treads
Installing LVP on stairs requires a different approach. Stair treads are typically glued down (not floated) using construction adhesive. Use a stair nosing piece at the front edge for a finished look and safe tread edge. Many flooring brands offer matching stair nose molding for their collections. Stair installations are more labor-intensive and may be a good candidate for professional help if you're not comfortable with the process.
Vinyl Plank Flooring Installation Cost: DIY vs. Professional
LVP installation cost is one of the top reasons homeowners search for how to install vinyl plank flooring themselves. Here's a realistic breakdown for a 1,000 sq ft project:
| Cost Category | DIY | Professional |
|---|---|---|
| Flooring material (1,000 sq ft + 10% waste) | $2,200–$6,600 | $2,200–$6,600 |
| Underlayment (if not attached) | $0–$300 | $0–$300 |
| Tools and supplies | $50–$100 | Included |
| Trim and transitions | $100–$400 | $100–$400 |
| Labor | $0 (your time) | $1,500–$4,000 |
| Total (1,000 sq ft) | $2,350–$7,100 | $3,850–$11,300 |
| DIY Savings | $1,500–$4,200 | |
When to hire a pro: Consider professional installation if you have complex room layouts with many obstacles, stairs, large areas that need seamless transitions between rooms, or if the subfloor needs significant leveling work. Professional installers also make sense if your time is more valuable than the labor cost.
When to DIY: If you have a reasonably flat subfloor, standard rectangular rooms, and a free weekend, click-lock LVP installation is genuinely one of the most beginner-friendly home improvement projects. The click-lock system is designed for homeowners, not just contractors.
Planning your budget?
Start with a sample to make sure you love the floor before ordering material. See the color, feel the click-lock mechanism, and test it against your subfloor.
Browse Samples →Common Vinyl Plank Flooring Installation Mistakes to Avoid
1. Skipping Subfloor Prep
The most common mistake. That small bump you think won't matter? It will. Every ridge, dip, and debris particle telegraphs through vinyl plank flooring. Take the time to level, sweep, and inspect before you lay a single plank.
2. Forgetting the Expansion Gap
LVP flooring needs expansion space around every wall, cabinet, island, pipe, and fixed object — 1/4″ for SPC vinyl, 3/8″ for WPC vinyl (check your product's guide). Without it, the floor will buckle when it expands. Use spacers during installation and don't forget them at doorways and around plumbing. If your install area exceeds 80 feet in either direction, transition pieces are required.
3. Not Staggering End Joints
Aligned end joints look unnatural and create weak points. Stagger by at least 8″ between end joints on adjacent rows. Avoid "H" joints (where seams line up every other row). Vary the size of your starter piece — cut pieces shorter than 8″ should not be used as starters.
4. Ignoring Acclimation Requirements
WPC vinyl needs at least 24 hours of acclimation at room temperature before installation. SPC vinyl doesn't require formal acclimation, but if boxes were stored in extreme temperatures, bring them to room temperature for a few days before installing. Room conditions must be consistent with year-round living conditions for at least 5 days prior to installation.
5. Adding Wrong Underlayment
If your LVP has attached underlayment, adding another layer creates a spongy, unstable floor that will damage click-lock joints. If you do need a separate underlayment, it must not exceed 2mm thick — and use one approved by your flooring manufacturer. Using an unapproved underlayment or moisture barrier can void your warranty. A moisture barrier (like 6-mil plastic on concrete) is always required even if your floor is waterproof, since moisture can create mold or mildew underneath.
6. Forcing Click-Lock Joints
If a plank doesn't click easily, something is wrong — debris in the joint, misaligned angle, or a slightly warped plank. Hammering harder will damage the locking mechanism. Remove the plank, check for obstruction, and try again at the correct angle.
7. Not Reading Your Product's Install Guide
Every manufacturer has specific instructions that may differ from general advice. Things like maximum continuous run length before a transition strip, specific adhesive requirements for glue-down, or radiant heat compatibility vary by product. Always check the installation guide for your specific flooring — it's usually available on the product page or from the manufacturer.
The Biggest Mistake? Not Ordering Samples First.
Photos and screens don't capture how a floor actually looks in your space. Lighting, wall color, cabinets, and furniture all change how a floor reads in person. We've seen homeowners order hundreds of square feet based on a photo, only to realize the color doesn't work once it's down.
Place samples on your actual subfloor. View them in morning light and evening light. Slide them next to your trim and furniture. This five-minute test saves you the cost and hassle of returning full boxes.
Order Samples — See the Real Floor First →The Floors We'd Install Ourselves
Every floor we carry clicks together the same way, but some make the job noticeably easier. These are the four we recommend most often to first-time installers, and why.
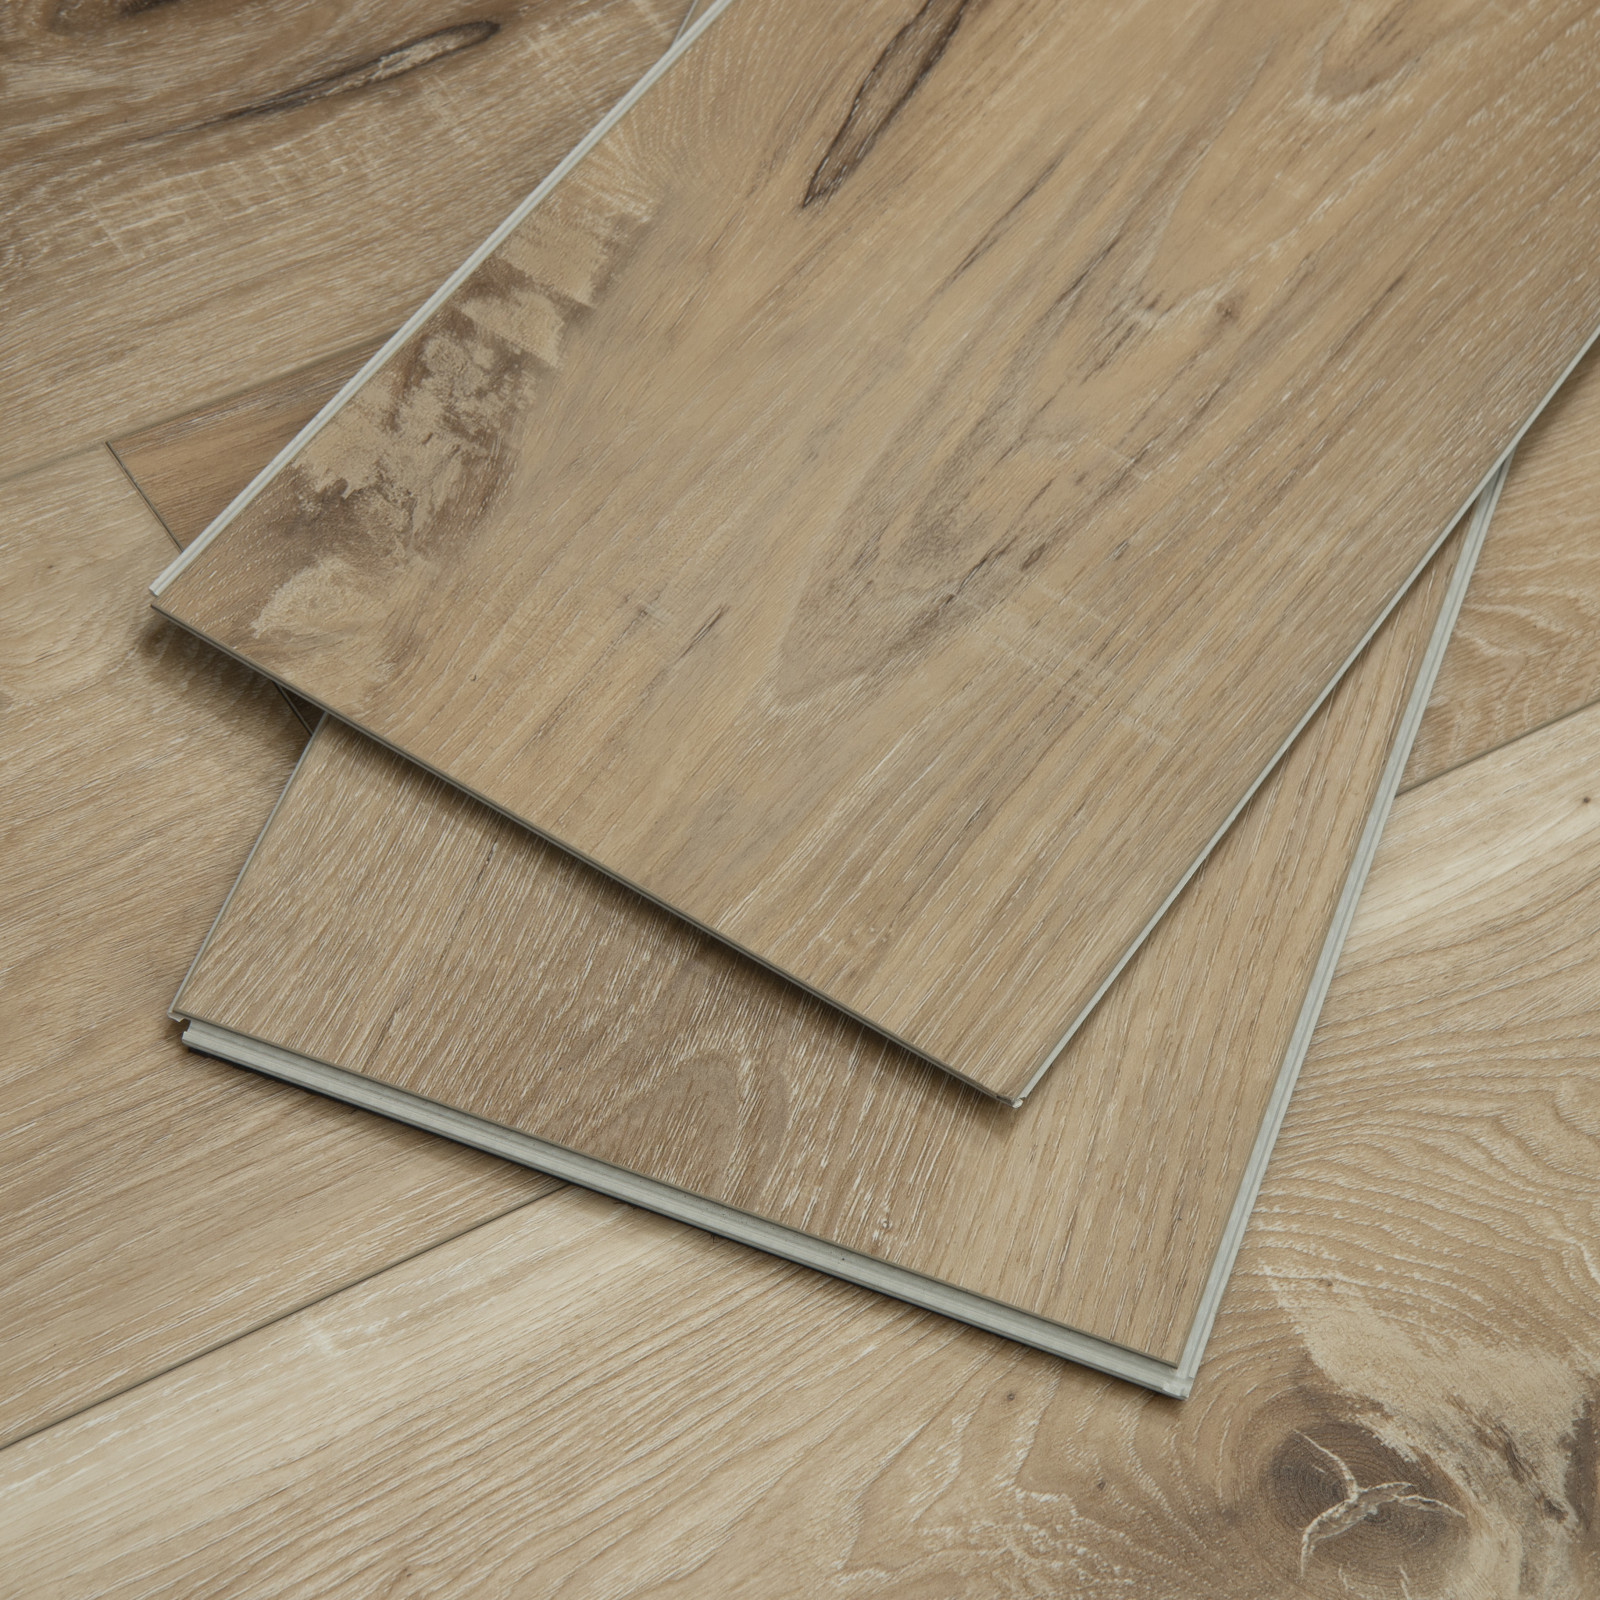
 Seaboard OakCALI LongboardsExtra-long 70-7/8 inch planks cover big rooms fast with fewer seams to align. Our most-installed floor of 2026.View Floor →
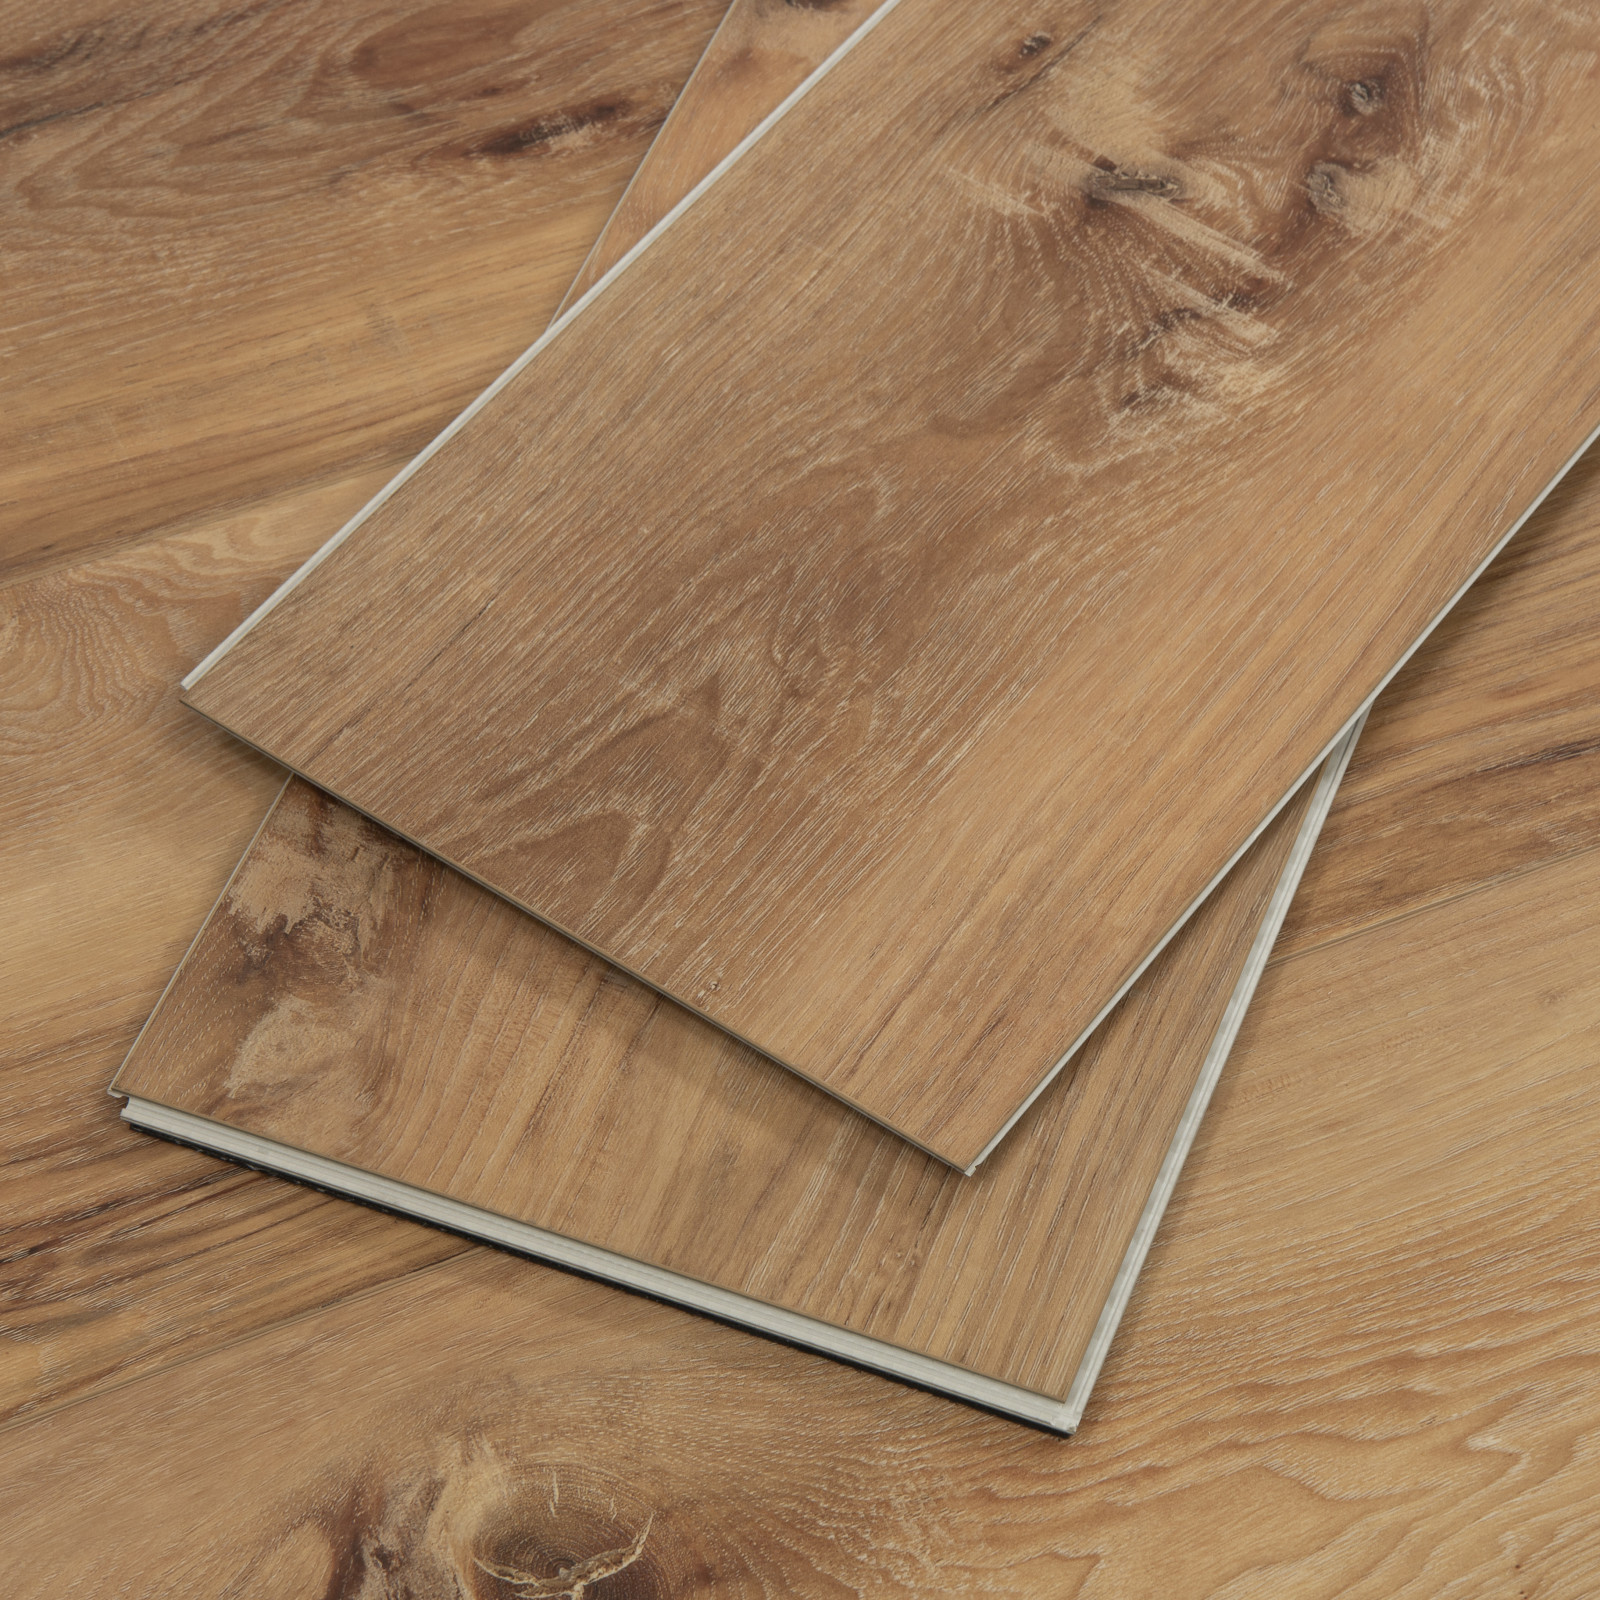
 North Shore OakCALI LongboardsThe same fast-covering Longboards format in a warm medium oak that hides dust while you work and daily wear after.View Floor →
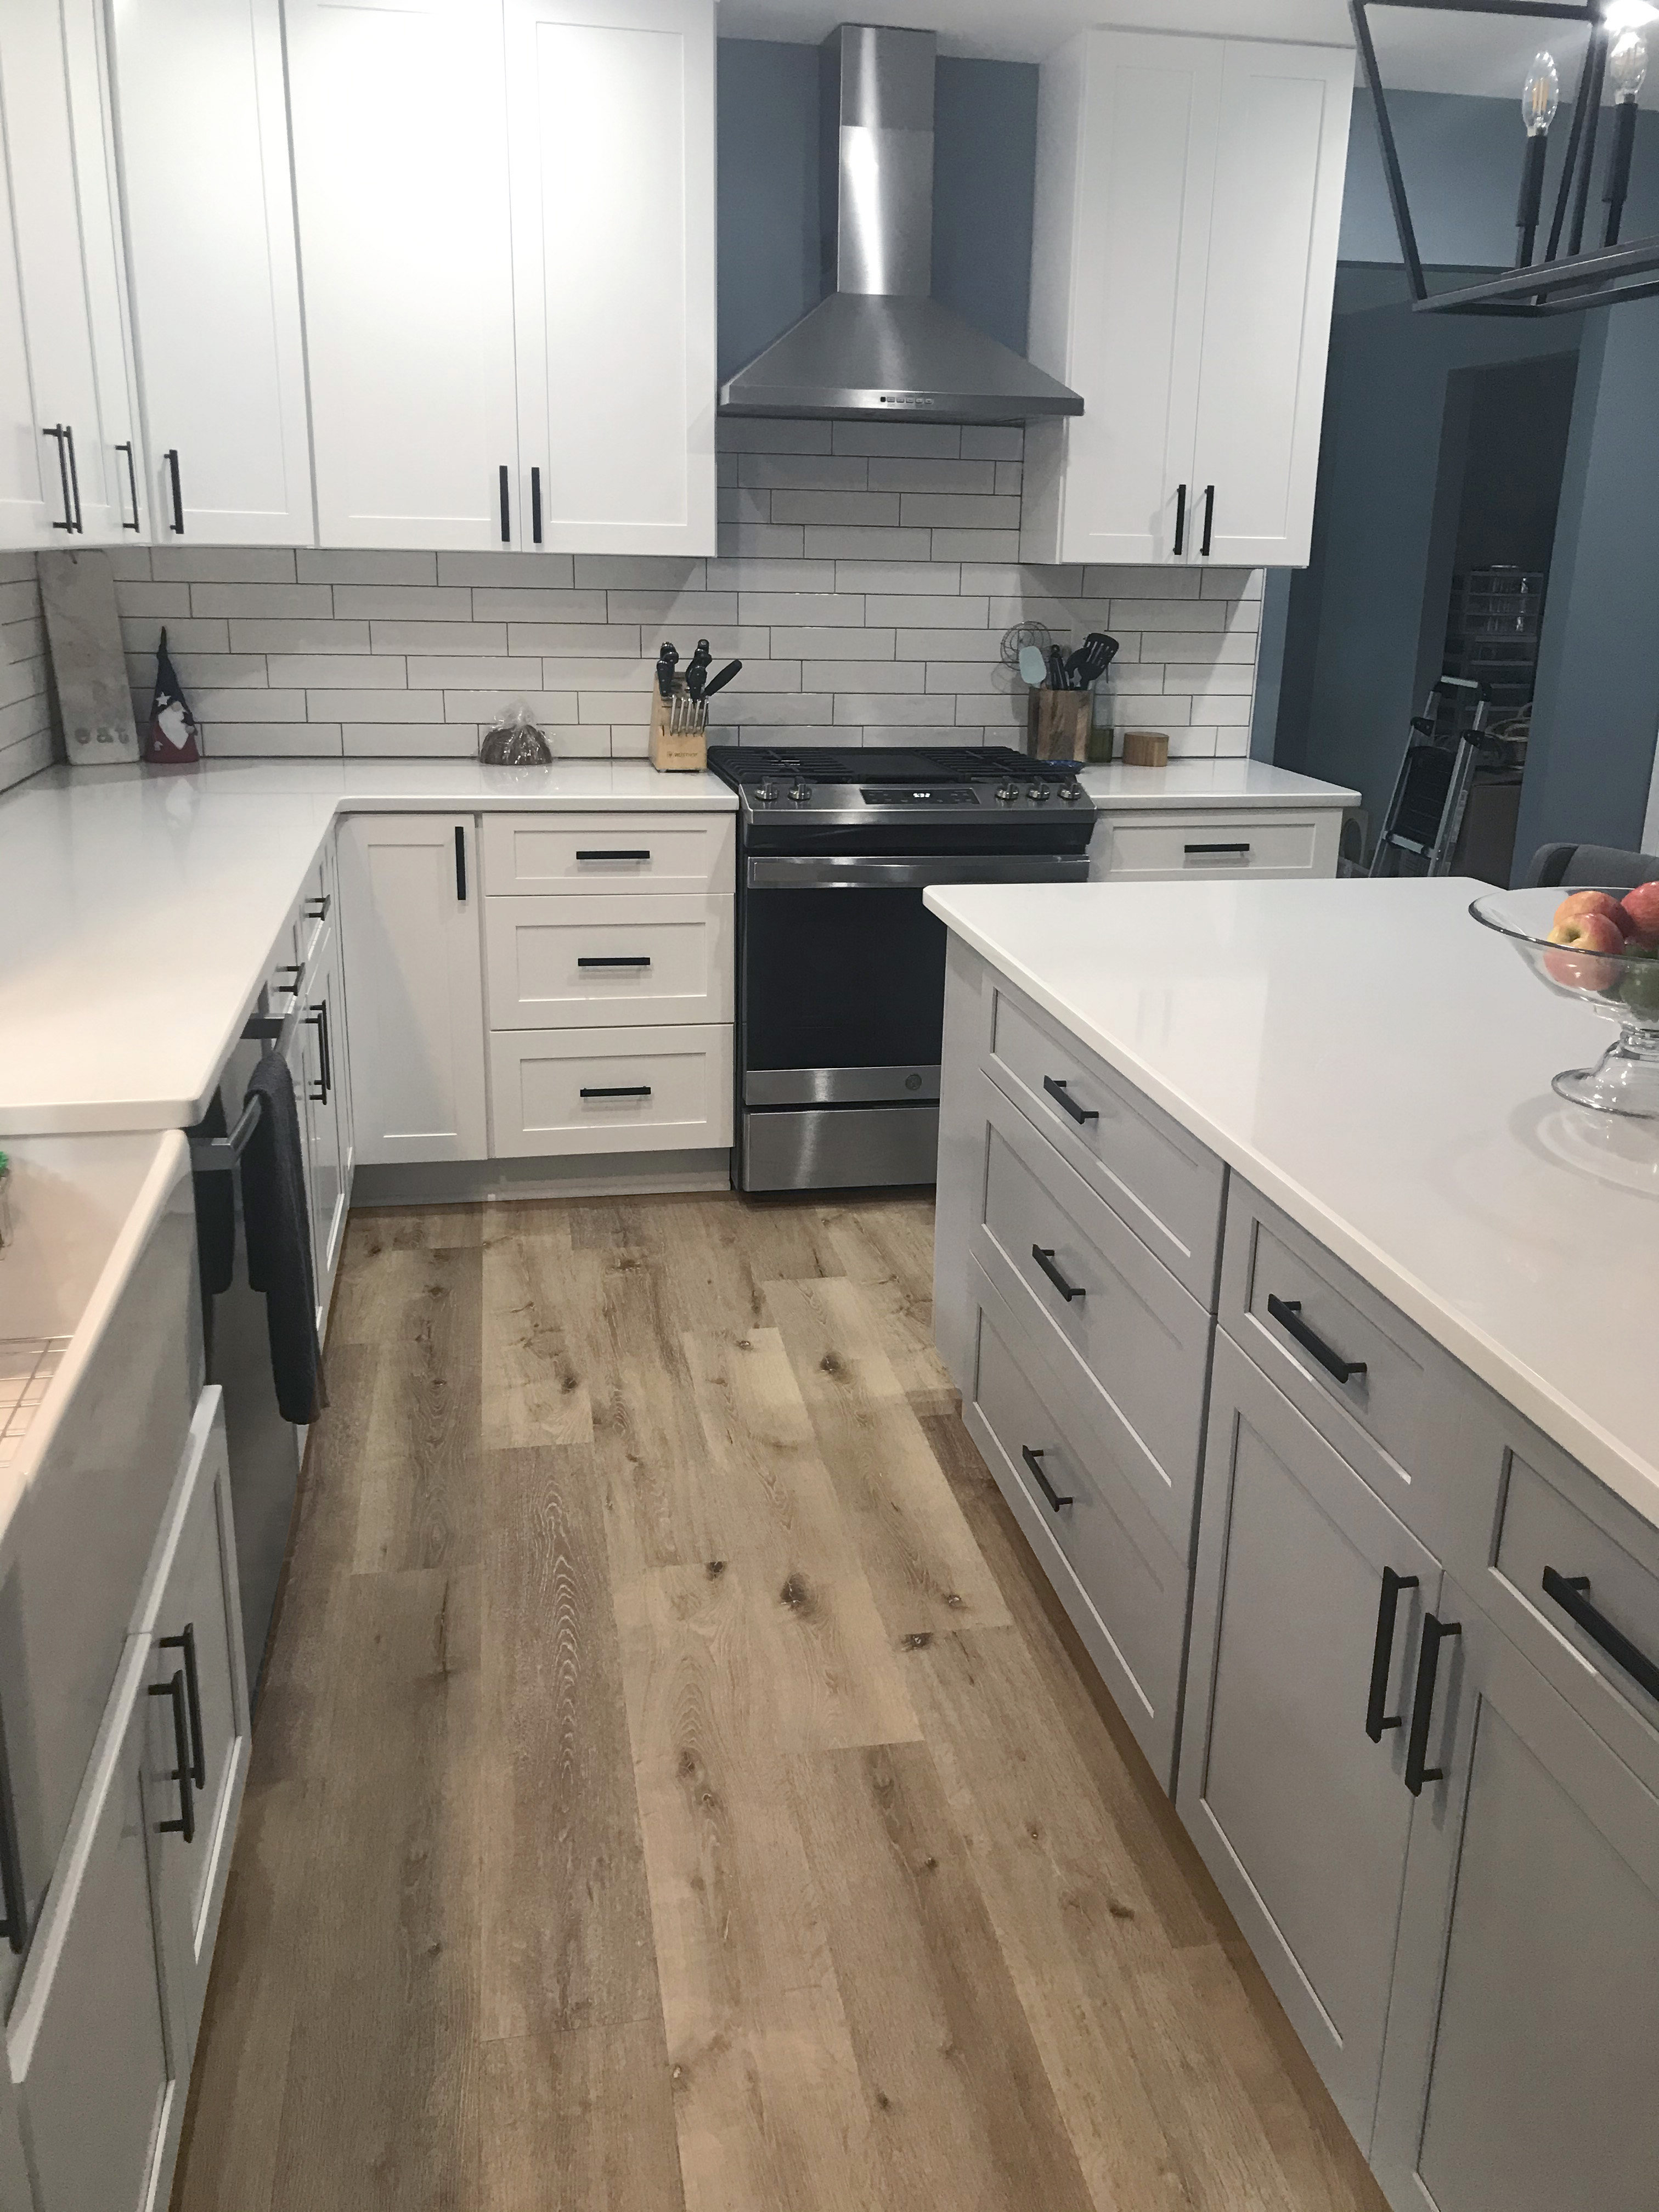 Aged HickoryCALI Select PremiumSmaller 48 inch planks are the easiest to handle solo, and the 22 mil wear layer is the thickest we carry.View Floor →
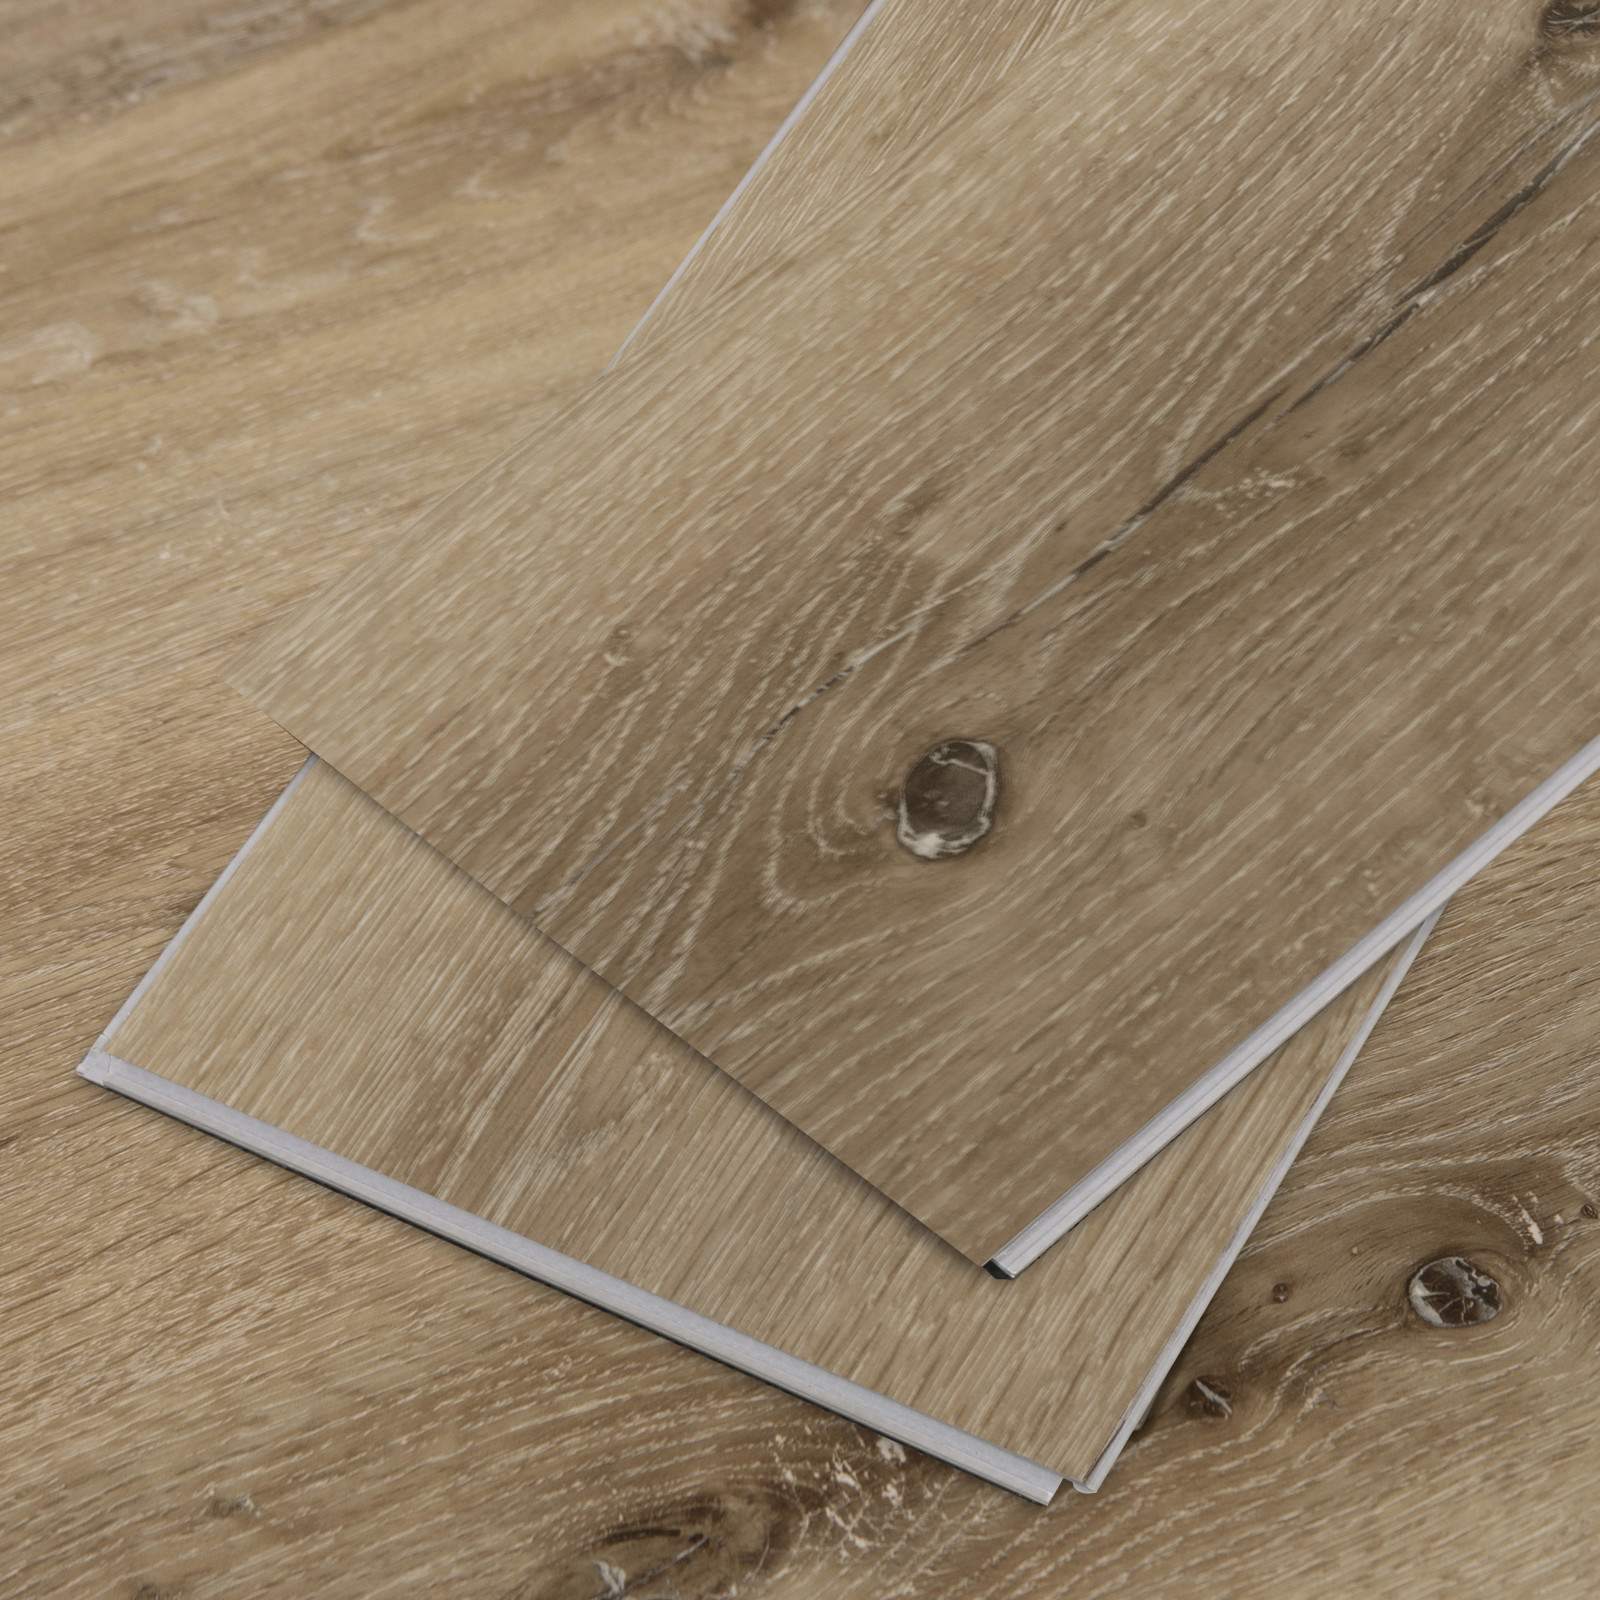
 SandinoMSI Everlife CyrusA rigid SPC core with a positive, satisfying click that forgives first-timer taps. The value pick for whole-home projects.View Floor →
Order the samples from this guide.
Photos get you close. Holding the plank in your own light gets you certain. Samples are free, shipping is a flat $9.99, and they arrive at your door in days.
Vinyl Plank Flooring Installation FAQ
How long does vinyl plank flooring installation take?
Most DIYers can install 200–300 square feet of vinyl plank flooring per day. A typical 12’ x 15’ room takes 4–8 hours depending on the room layout and how many cuts you need around obstacles. Larger format planks (like 9″ x 70-7/8″ Longboards) install faster because you lay fewer planks per square foot. SPC vinyl can be installed immediately with no acclimation wait. WPC vinyl needs at least 24 hours of acclimation at room temperature before you start. Budget a full weekend for a 500+ sq ft open-concept space.
Can you install LVP over existing flooring?
Yes — you can install luxury vinyl plank flooring over most existing hard surfaces including tile, hardwood, laminate, concrete, and existing vinyl (single layer only, not cushioned). The existing floor must be clean, flat, and firmly bonded. Do not install over carpet, cushioned vinyl, or any surface that flexes underfoot. For tile, fill grout lines with a compatible patch compound to create a flat surface. For existing vinyl, do not sand it — older vinyl may contain asbestos.
What is the cost to install luxury vinyl plank flooring per square foot?
DIY vinyl plank flooring installation costs $0–$0.50 per square foot in materials (spacers, underlayment if not attached, utility blades). The flooring itself typically runs $2–$6 per square foot depending on quality. Professional LVP installation adds $1.50–$4 per square foot for labor. Total installed cost: $3.50–$10 per square foot professionally, or $2–$6.50 DIY. For a 1,000 sq ft project, that’s roughly $2,000–$6,500 DIY vs. $3,500–$10,000 installed.
Is waterproof vinyl plank flooring harder to install?
No — waterproof vinyl plank flooring installs exactly the same as standard LVP. Both SPC (stone polymer composite) and WPC (wood polymer composite) vinyl use click-lock floating installation. The main difference is acclimation: SPC vinyl doesn’t need acclimation and can be installed immediately, while WPC vinyl requires at least 24 hours of acclimation at room temperature. SPC also uses 1/4″ expansion gaps vs. 3/8″ for WPC. Both are waterproof, but you still need a moisture barrier on concrete subfloors to prevent mold underneath.
Do I need underlayment for LVP flooring?
It depends on your product. Many premium LVP floors come with underlayment already attached — if yours does, do NOT add a separate underlayment on top (this causes the floor to feel spongy and can void your warranty). If your vinyl planks do not have attached underlayment, use one no thicker than 2mm and make sure it’s approved by your flooring manufacturer. Using an unapproved underlayment can void your warranty. Regardless of underlayment, a moisture barrier (like 6-mil polyethylene plastic) is always required on concrete subfloors.
The Bottom Line
Vinyl plank flooring installation is one of the most rewarding DIY home projects. The click-lock system is genuinely designed for homeowners, not just contractors. With proper subfloor prep, patience during acclimation, and attention to expansion gaps, you can achieve a professional result in a weekend. Start with a sample to make sure you love the color in your space, then order 10–15% extra material and commit a weekend. You'll save hundreds (or thousands) in labor and end up with a floor you installed yourself.
Related Guides
Best Vinyl Flooring 2026: Top 5 Picks
Editor-tested luxury vinyl plank across three collections, reviewed and ranked
Waterproof Flooring Guide 2026
Vinyl, laminate, hardwood, and bamboo compared for water resistance
Budget-Friendly Flooring 2026
Premium looks at mid-range prices across all flooring categories
Pet-Friendly Flooring Guide 2026
Waterproof, scratch-resistant flooring for homes with dogs and cats